How to remove a screensaver on Windows Vista

Like any other application installed using an installation program (or "setup wizard"), most screensavers can be removed from Windows Vista through the "Programs and Features" panel.
If a screensaver was installed by copying a screensaver file to your Windows folder, uninstallation will require manually deleting that same file from your hard drive. You can also do this with screensavers that were installed using a setup program, but there is a chance that some files may be left behind. This clutters the drive, but is not harmful.
This help page guides you through the steps required to remove a screensaver from Windows Vista, preferably via the "Programs and Features" panel, but alternatively by manual removal of the screensaver file from your computer hard drive.
Uninstalling via the "Programs and Features" panel
Open the Control Panel
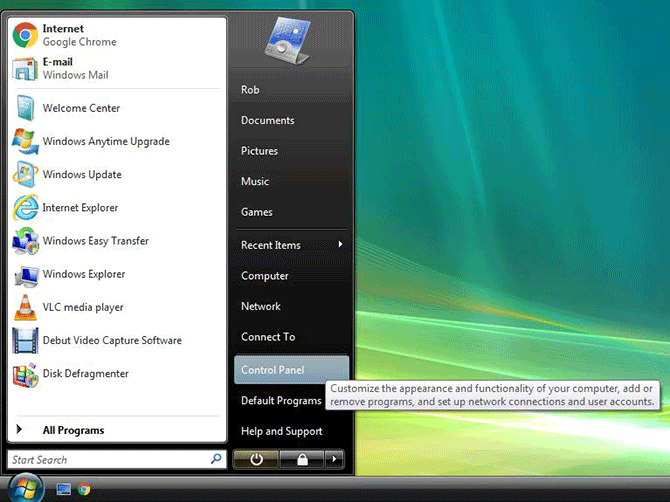
The "Programs and Features" panel is a part of the Control Panel on Windows Vista. To access the Control Panel, click the Start menu button in the bottom left corner of the screen, then click the "Control Panel" link (pictured below).
Open the "Programs and Features" panel
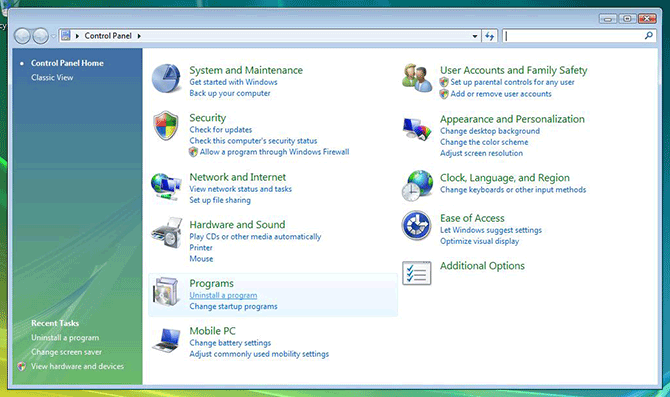
Once you have opened the Control Panel, you can access the Programs and Features panel by clicking the "Uninstall a program" link just beneath the "Programs" header.
Uninstall the screensaver
Locate the name of the screensaver you wish to remove in the list of installed programs shown in the Programs and Features panel, click it once and then click the "Uninstall" bottom (just above the list of programs, as pictured below).
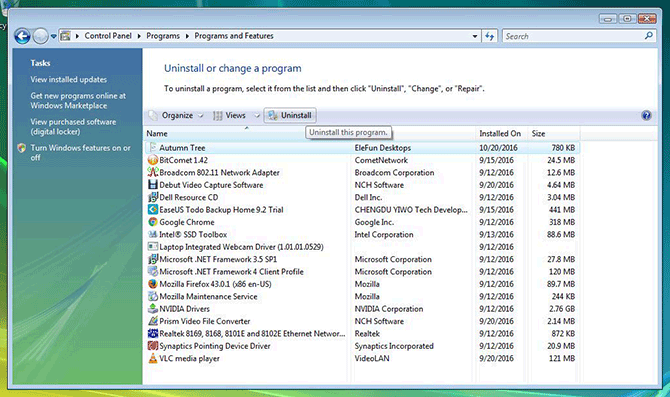
Follow any instructions given by the uninstallation program to complete the removal. Afterwards, the name should disappear from the list in the Programs and Features panel.
If the uninstallation is unsuccessful, or your screensaver is not listed, you can optionally follow the instructions for manual removal of a screensaver below.
Manual removal
If you installed a screensaver manually by copying a screensaver file to the Windows folder on your hard drive, or automatic uninstallation via the Programs and Features panel fails, you can try to "uninstall" the screensaver by deleting the screensaver file from your system.
Open the Explorer
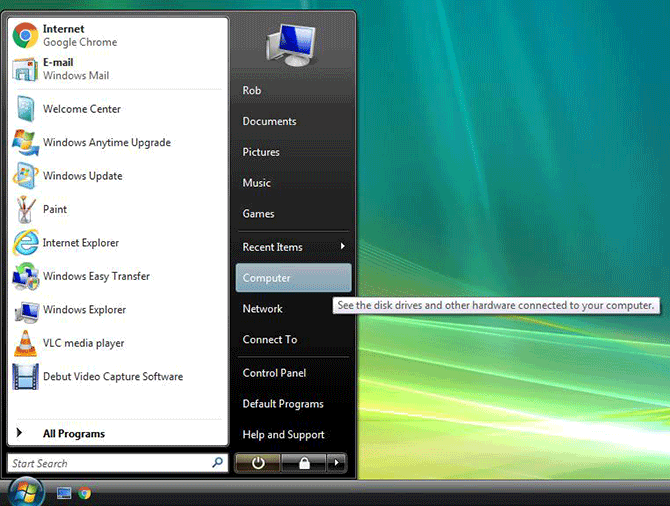
As on other versions of Windows, you can view and manage files and folders on your hard drive via the Explorer. To open the Explorer, click the Start menu button in the bottom left corner of the screen, then select "Computer" (as pictured below).
Open the Windows folder on your C drive
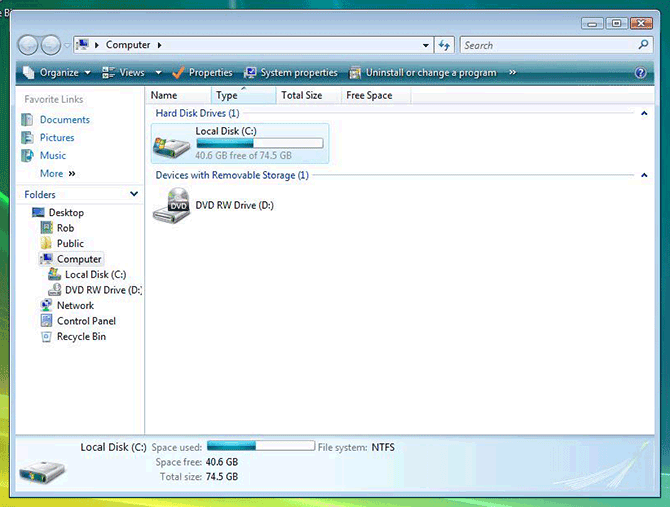
In the Explorer, make sure "Computer" is selected in the left sidebar, then double-click the "C:" hard disk drive (highlighted below) in the panel on the right to show its contents.
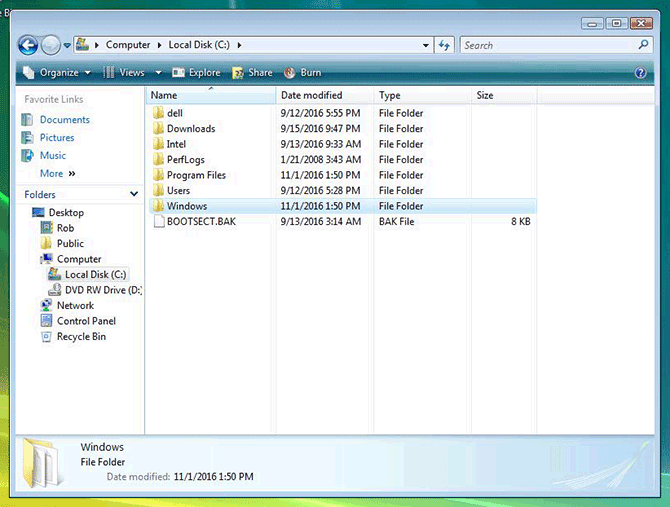
Locate the "Windows" folder in the list of files and folders and double-click to open it.
Remove the screensaver file
Inside the "Windows" folder you will find more folders and files in an alphabetically sorted list. Locate the screensaver file (its type will be set to "Screen saver") belonging to the screensaver you wish to remove, then right-click that file and select "Delete".
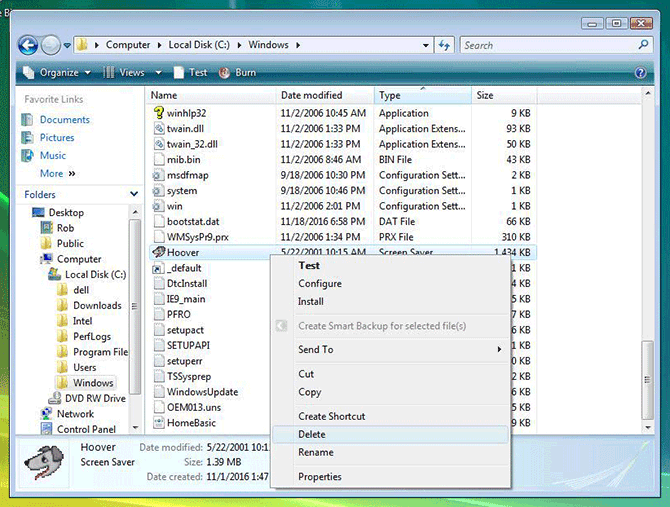
You can optionally sort the list by file type by clicking the "Type" header just above the list of files and folders. Files with the type "Screen saver" are now grouped together.
If you cannot find the screensaver, it may reside in the "System32" or "SysWOW64" sub-folders instead. Scroll up to the list of folders, then double-click these folders to open them, and browse their contents to look for the screensaver you want to delete.
If you successfully deleted the screensaver file, the screensaver should no longer appear in the list of installed screensavers the next time you open the Screen Saver Settings panel.
Need help? Have questions?
We're here to help. Post your question or problem on our message board.